Tuesday, June 12, 2018

Old Lady to Young Lady Part 11

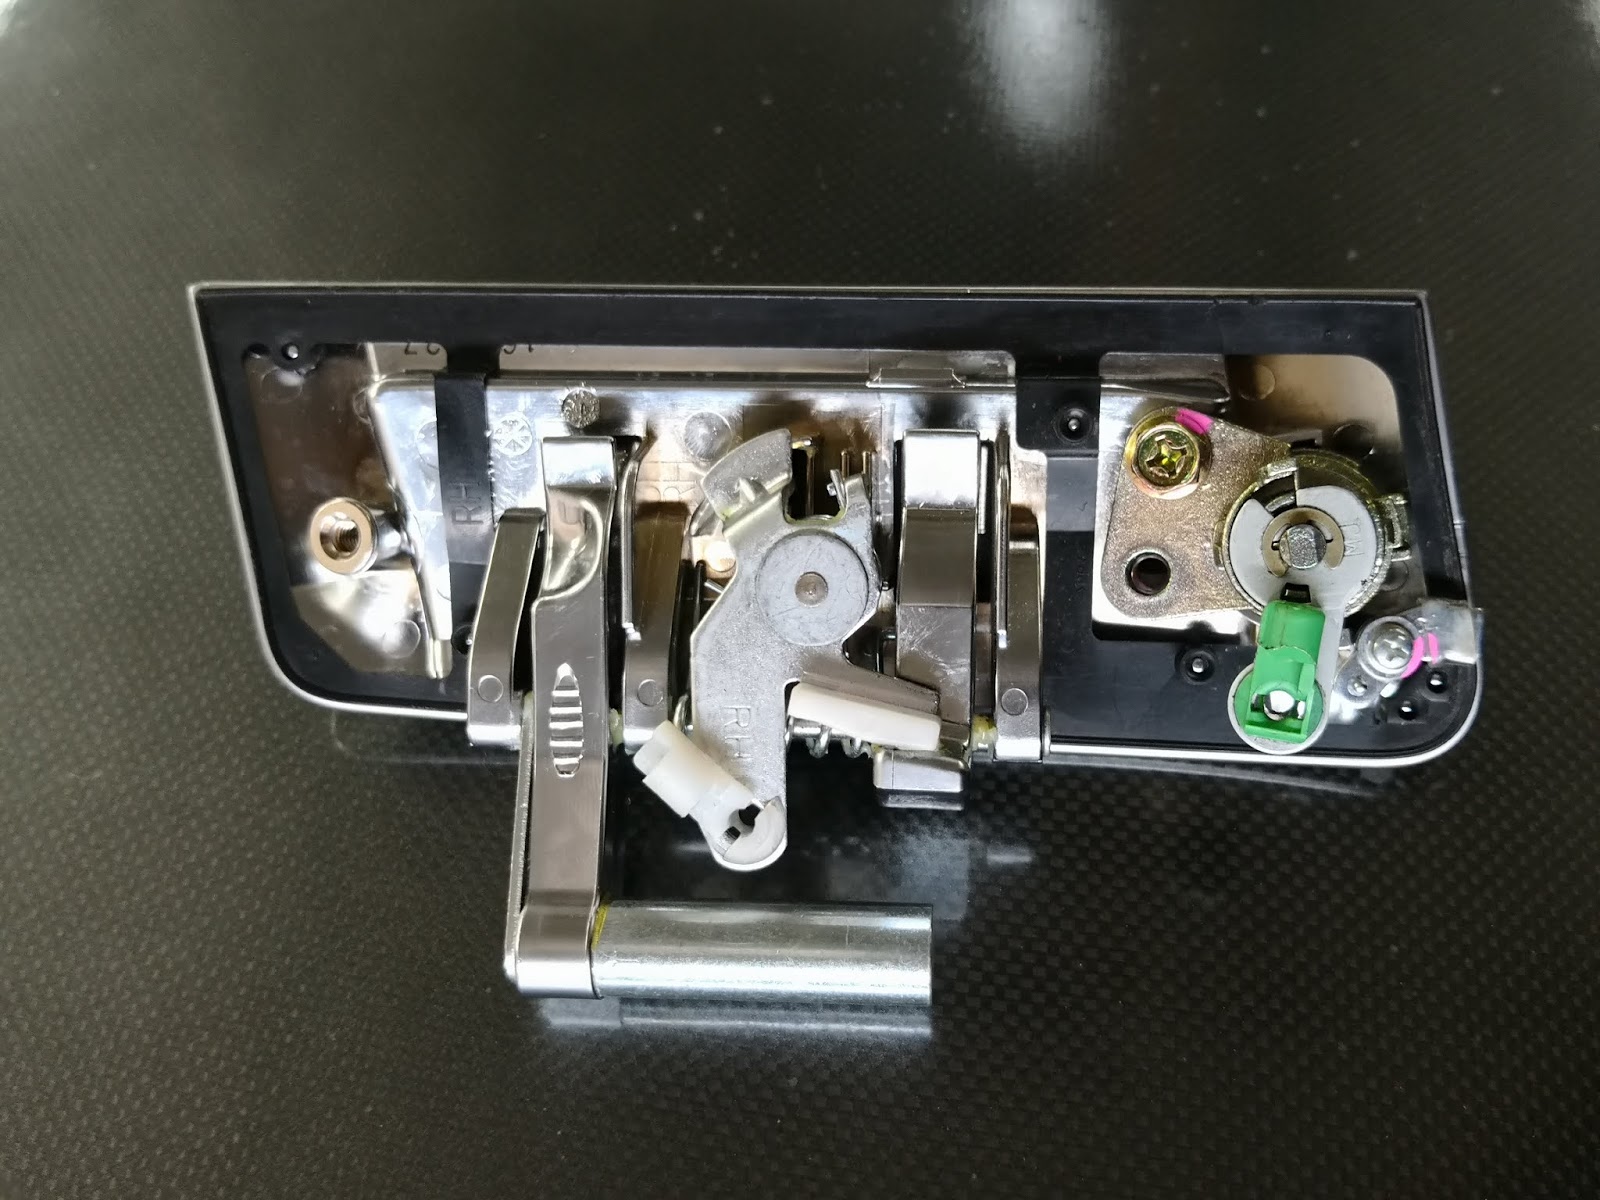
I have been having difficulty with my Nissan Fairlady Z's car alarm system. There is a security measure where I have to step on the clutch pedal and turn the key when I want to start the engine. Sometimes, I could not start the car even though I stepped on the clutch. This results in me having to open and close the door, and lock and unlock the car multiple times until it starts up. Other times, the remote control just would not work, no matter how many times I pressed the button. One fine day as I was trying to get inside the 350Z to go to work, the door would not open. I pressed the remote many times but the door handle was still lock. I figured it must have been the alarm system but when I went to the passenger side, the door was opened. I climbed in from the left side and opened the driver side door from the inside and it worked. The outside door handle must be broken. Thus, for the next few days, I had to go in through the passenger side and stick the key inside the ignition and roll down the driver side window. Then enter from the driver side by opening the door from the inside.


At first I was not in a hurry to fix this problem but then I was told I had to travel to another state for work. This seems like a good opportunity to take my 350Z out for a spin and enjoy the long highway (around 600 km round trip) but I would have to fix my 350Z. So, I have to replace the door handle quick. I contacted both Redsun Motorsport and a parts seller that specialize in 350Z parts to get an estimate. Lucky for me, the seller has a used one in stock. After consulting with Redsun on the price from this seller, I went ahead to visit the seller. The drive itself was 30 minutes but it took less than 10 minutes to replace the handle. There is a hook-like plastic component inside the handle that broke and you have to change the whole handle as that part could not be repaired. Redsun told me I should be careful with the handle and from now on I will only hold the door instead of the handle after I pull it. I was surprised that such an important part is made of plastic and could easily broken. Nissan should have designed this better.

Original with the broken part
New (used) Handle
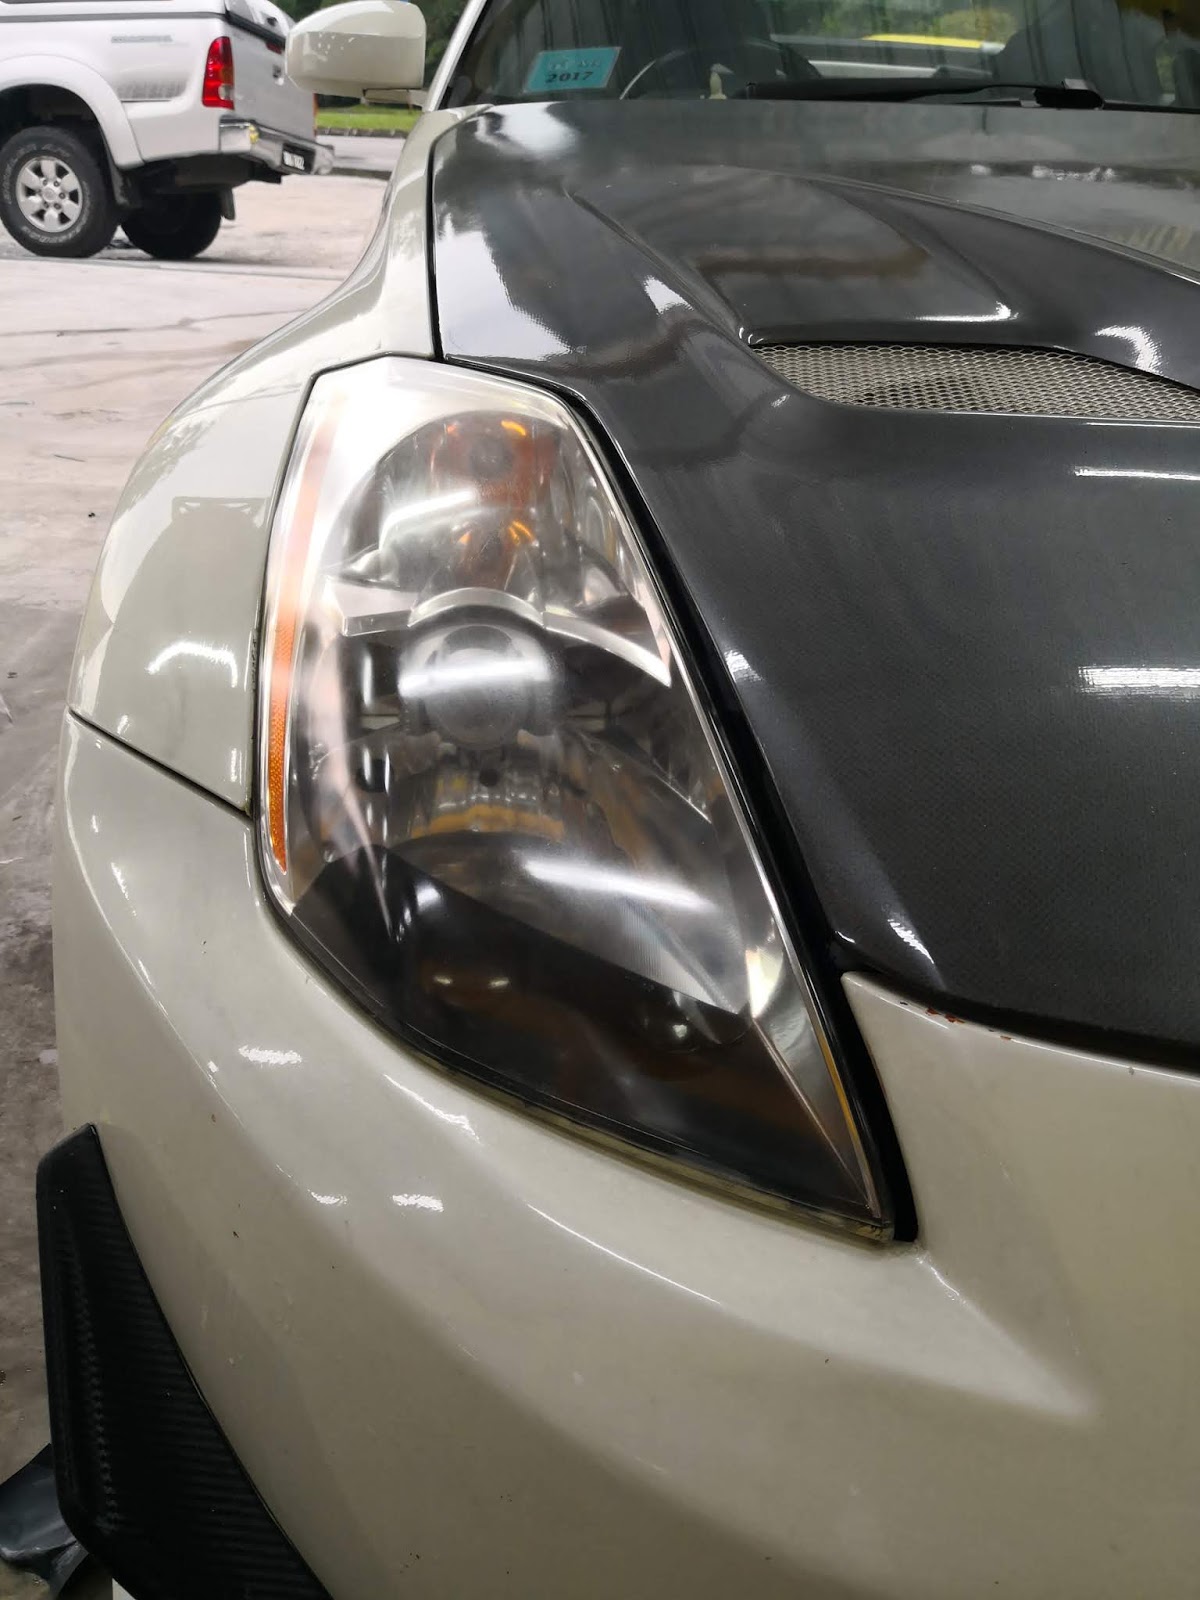
After the handle problem was done, I was in a good mood and I remember that there was a bit more I need to do before the work trip. There is a car accessories shop near my office and I decided to drop by. This particular shop just opened few months ago and I have been wanting to visit. One important thing that I need to change is the wiper, in case it rains. The original one was a bit short and the rubber had came out. I am going to buy a longer one so that it could wipe more area. While I was waiting, I thought of something that is needed to be done on my 350Z. The previous owner wnet and chopped of the radio antenna that was sticking out from the rear fender. That is why I could not get any radio reception. Another thing is my fogged up right headlamp. I decided to ask the cost to defog my headlamp and install an indoor radio antenna. It was cheap and I went ahead and got all of the above done. The indoor antenna is just a small bar, the size of a long ruler and the guy had to remove the center console and join the wiring to the touch screen. I wanted to stick the antenna where the rear view mirror was but wiring was not long enough. So, it is now by the A pillar, stuck on the windscreen.

New Wipers

Wiper Brand
Left: Radio Antenna on Rear Fender, Right: Missing Radio Antenna (Mine)

Location of Indoor Radio Antenna

Removing of Center Console
As for the headlamp, there are a few processes. First, the perimeter of the headlamp is secured with masking tape. Then, the surface of the headlamp undergoes some wet sanding down with 3 different grades of sandpaper. Lastly, with some smoke producing contraption, the surface of the headlamp is coated with the smoke. Just like magic, the fog lifts up immediately. Clearing the surface and returning the headlamp to its clear glory. My headlamps are finally matching now. The best part is the total cost to install the antenna, defog the headlamp and new wipers are just a little above half of the cost of replacing the door handle. So much done but at a fraction of the price. That is what I call worth it. I definitely like the service and price at this accessories shop. I might come again for other installation like a new alarm system and the gear shift indicator I bought a year ago. 


Tuesday, May 22, 2018

Old Lady to Young Lady Part 10

It has been one year and two months since my ownership of a Nissan Fairlady Z began. When I bought the 350Z, it is a 15 year old car and to me, it is important to have it running and performing as it should when new. So, I had a plan to rebuild the 350Z, where the first year will be focused mainly on the mechanical and performance side. The next year will be focused on the exterior looks and hopefully, focus on the interior during the third year. After spending a lot of money and some time last year in Redsun Motorsport, I can say that most of the problems that occurred are now solved. I am glad that it is in good running health and this year, I can now focus on the exterior as planned. I have been planning what I would do to the 350Z in terms of looks since last year. Firstly, the whole body kit (including front and rear bumpers, side skirts and spoiler) will be changed. Then, a change of color with new coats of paint and lastly, the rims will be changed. I already have a particular set of body kit that I like but not for the rims. I want a rim design with many spokes and in gunmetal color but it is difficult to find the right width and offset that suits the 350Z. I would find the right design but the wrong size and vice versa while searching online.

Rays GT30 rims Refurbished


Initially, I wanted to get the rims after I have done the body kit and change of color but things did not go according to my plan. I was searching online and found a set of rims with the right size and the design was acceptable with many spokes.  I sent a text message to the seller and was surprised that this was my friend. We started to talk about whether the rims would fit my 350Z and what can he do for me on the price. He gave me a discount and said he will send the rims to have it refurbished at my expenses. I told him I would consider but then the clutch pump incident happened. I called him, telling him I spent some money on the repair and could not buy the rims for the time being. He told me he already sent the rims to refurbish and I knew I have no choice but to go on with the deal. After a month, I was told the rims were done. I head over to the tyre shop on a Saturday after work and I brought a set of Rays wheel nuts that I bought some time ago. The old nuts were mostly rusty and of a smaller size, which requires a special adapter to unlock the nuts. The Rays nuts come with 4 pieces of special lock nuts but I received only had 19 pieces from the factory and the seller told me he would claim one piece for me. So, I thought why not just use 19 pieces and 1 old one just temporarily until I receive the other one.


Left: Installed new rims without wheel cap. Right: Rays Dura-Nuts (Missing One from Beginning)

When I first saw the rims, I was wowed by what a great job the shop did to refurbish the rims. The chrome outer lip was polished until shining and the spokes were painted. This is a big contrast from the original set of rims where the chrome lip was dull and paint on the spokes look less shiny. It took a few hours to remove the original GT-S rims, remove the tyres from the rim, install tyres on the new GT30 rims and install the new rim. I have to admit, I was nervous on how my 350Z would look like with the new rims. There are some similarities between these 2 sets of rims. Both sets are of the same brand, RAYS, both are a three-piece design with chrome outer lip and both have similar colored spokes. The only different is the amount of spokes but later on, I found out that the offset for the front is different for these 2 sets. While the original rims could clear the front Brembo calipers, the new rims could not and have to use a 5 mm spacer. Next, I realized that the GT30 rims do not have wheel caps. I asked the tyre shop to remove the wheel caps on the GT-S, so I could put those on later. The end result I would say, was spectacular. Just a minor change and I could feel the sportiness of the 350Z has increased. The Ray wheel nuts complements the rims very much. Now my challenge is to sell of the old rims and hopefully spend that money on body kits. It is not easy to sell rims with this size and offset.  

One of the Wheel Caps that required work to install it. 
Original - Rays GT-S rims
New - Rays GT30 rims

Wednesday, March 28, 2018

Old Lady to Young Lady Part 9

After the last visit to Redsun, I now know the cause of my Nissan Fairlady Z's left headlamp's problem.  The headlamp unit had water seeping in and caused the ballast and ballast cable to short circuit. I asked Redsun to search for the parts but at the same time I will be searching online. I started looking on an online trade website and managed to find a seller for the headlamp. Since the condition of the unit is not good, I might as well change the unit as well. I met the seller and was surprised that I was getting 2 left headlamps for the price of 1 and at a cheap price. One of the headlamp was perfect, had all the bulbs but ballast was missing and had some signs of old age. The other one could not be used because the housing was ripped. A few days later I found someone selling used ballast with ballast cable at a cheap price. I bought it and brought everything to Redsun to have those fixed. At the end of the day, the price for all the parts I bought is only 10% more than what Redsun was going to charge me for just the ballast. I would say I did pretty good and had a steal on the price.
It took around 1 and a half hours to remove part of the front bumper and install the left headlamp.

2 for 1 - Left: One with ripped housing, Right: Perfect replacement.
                             Perfect (Front) - No chip, No crack                                Perfect (Back) - Ballast missing

Used Ballast with ballast cable
On another note, right from the start of my ownership, I noticed that the headlamp is quite dimmed when the lights are on at night. I was told that the pre-facelift models' HID light is not bright enough.
I wanted to change to the facelift ones but now I know it was because of the tinting on my headlamps. So, I asked Redsun to remove the tinting from my right headlamp, that was done by the previous owner. However, by removing the tinting, there is a sticky residue from the adhesive that causes the headlamp to blur. The mechanic then rubbed some brake fluid and it started to clear a little but it went bad when he changed to car polish instead. I do not have the time to send the 350Z to have its headlamp polished. I will just have to drive it as it is, temporarily. Now, it looks bad during the day but at least both headlamps work well at night and it is brighter now without the tinting. I won't be mistaken for a motorbike when I tailgate someone. Next thing I should do is have someone look at the headlight and polish it so it could be clear.

Just removed tinting and rubbed with brake fluid
After brake fluid and car polish
On another note, if you remember, previously I bought a petrol cap that I have yet to install. I finally had the time for some D.I.Y. and got it installed. It was not an important repair but it was an eyesore. Every time I pump petrol, I had to find somewhere to put the petrol cap, which is annoying. This task only required an Allen key wrench and 5 minutes to remove the metal plate. At first it looks difficult because the C-shape opening is behind the flipping mechanism. So, the petrol cover has to be loosen as well. It is much better to the eye and more convenient now. I am satisfied. Not every repair or mod has to cost a lot to be a good mod.

Old 
New

Left: Broken cable, Right: With cable


Tuesday, February 6, 2018

Old Lady to Young Lady Part 8

One night while I was moving my Nissan Fairlady Z, the clutch pedal was stuck. It would not rise up after I have stepped on it. I keep stepping on the pedal, hoping it will pop up but it did not. I was lucky because I was done with the move because it would have been a disaster if I was driving and this happened. So, I quickly pop the hood and examined the clutch fluid tank. I found out it was bone dry and then I tried to pull the pedal up with my hand. Good thing it came up and I stepped on the clutch multiple times to see if it would get stuck again. It was fine but without any fluid in the tank, I suspect something is faulty. I text my mechanic friend on what I should do and he told me to rush out to find clutch fluid to pour into the tank and pump the pedal for the fluid to flow. I quickly went to a nearby petrol station and did as I was advised. I pour the fluid to half full tank and pumped the pedal. I left it for a few days before I brought the 350Z to Redsun Motorsport. I had an incident during my drive to Redsun. As I was pulling out after I pumped petrol, my clutch pedal was stuck again. I quickly stop the car, pull the pedal with my hand and pump a few times before I drive off. It was definitely scary and I was worried during the whole drive. I made it after a while and left the 350Z in the workshop for it to be repaired. I also had other work done to my 350Z.

Replacing fluid on my own
I left my 350Z on a Saturday and on the next Monday, I got a phone call that it was ready to be collected with everything done. As usual, Redsun shows how efficient they are when it comes to solving problem. Also, the owner does not like to keep cars in the workshop for too long because there is no space and business is too good. Back to my issue, clutch pedal getting stuck is usually caused by either a leaking fluid tank or hoses, or a faulty clutch pump/assembly. The problem was confirmed to be a faulty clutch assembly by Redsun. They ordered and installed a new original Nissan clutch assembly (code: 30620-CD00A) which cost a lot. The clutch fluid was bled and refill with new clutch fluid. I was told that with the new clutch assembly, the pedal will be lower but it will soon get back to the usual height. My first drive after this repair was a bit of a bittersweet feeling. The usual height for example is 10 cm but now it is like 4 cm. It creates a little discomfort for me, how little space I have but the new clutch assembly made it seems easier to hit the balance point. The 350Z is easier to move away from a still and easier to start with 2nd gear with less shaking. I wonder is this how it should feel when it was brand new.


While my 350Z was at the workshop, the owner advised me to do a regular service since it has been a long time since my last service. As all car owners know, regular services are usually done at the interval of 5,000 km/3 months or 10,000 km/6 months depending on preferences or type engine oil used. However, I only manage to drive my 350Z for only 4,000 km in 10 months. My engine oil should be still in good condition. Nevertheless, since it has been 10 months, I agree to service my car. Redsun did the usual engine oil change with M7 engine oil and changed the oil filter. I also had them look into my Tein suspension set up. I found out that every time I go over a tall bump, the left side undercarriage will hit the bump. There is a theory that since the driver is always present, there is more weight on the right side and to support that, the suspension has to be stiffer and vice versa. I also found the suspension overall is too soft at the corners. I dunno what the owner did to the suspension but I can feel it is more balanced over the bumps. His tuning makes the car better but I have not tested in the corners yet.


Lastly, I had them look into my left headlight. I always thought my left headlight's problem was its blurred surface due to water trapped inside and the projector is still working. Recently, I realized that in actual, the projector was not working. I thought it was the bulb but Redsun said it was the ballast. They had a spare unit and I was happy that it could be solved but when I arrived at the workshop, they were still fixing the headlight. It seems that not only the ballast had malfunctioned but the cable from ballast to the bulb also malfunctioned and there is no spare. After toying with it for another hour or so, they concluded that nothing they can do and the best solution is to look for a used headlight and exchange. I had my hope crushed but they will look for a lamp for me. So, in the meantime I will be using my high beam while driving at night because the high beam still works and even at high beam it is not too bright. I guess that is better than being a cyclops on the road with other user of the road mistaking me for a motorbike.         

Current Headlamp condition


Left: Projector works, Right: Projector does not work


Left: Water caused cable to mold, Right: Burnt parts on ballast
Both side headlamps removed

Testing and trying to modify cable from another ballast